Printfriendly

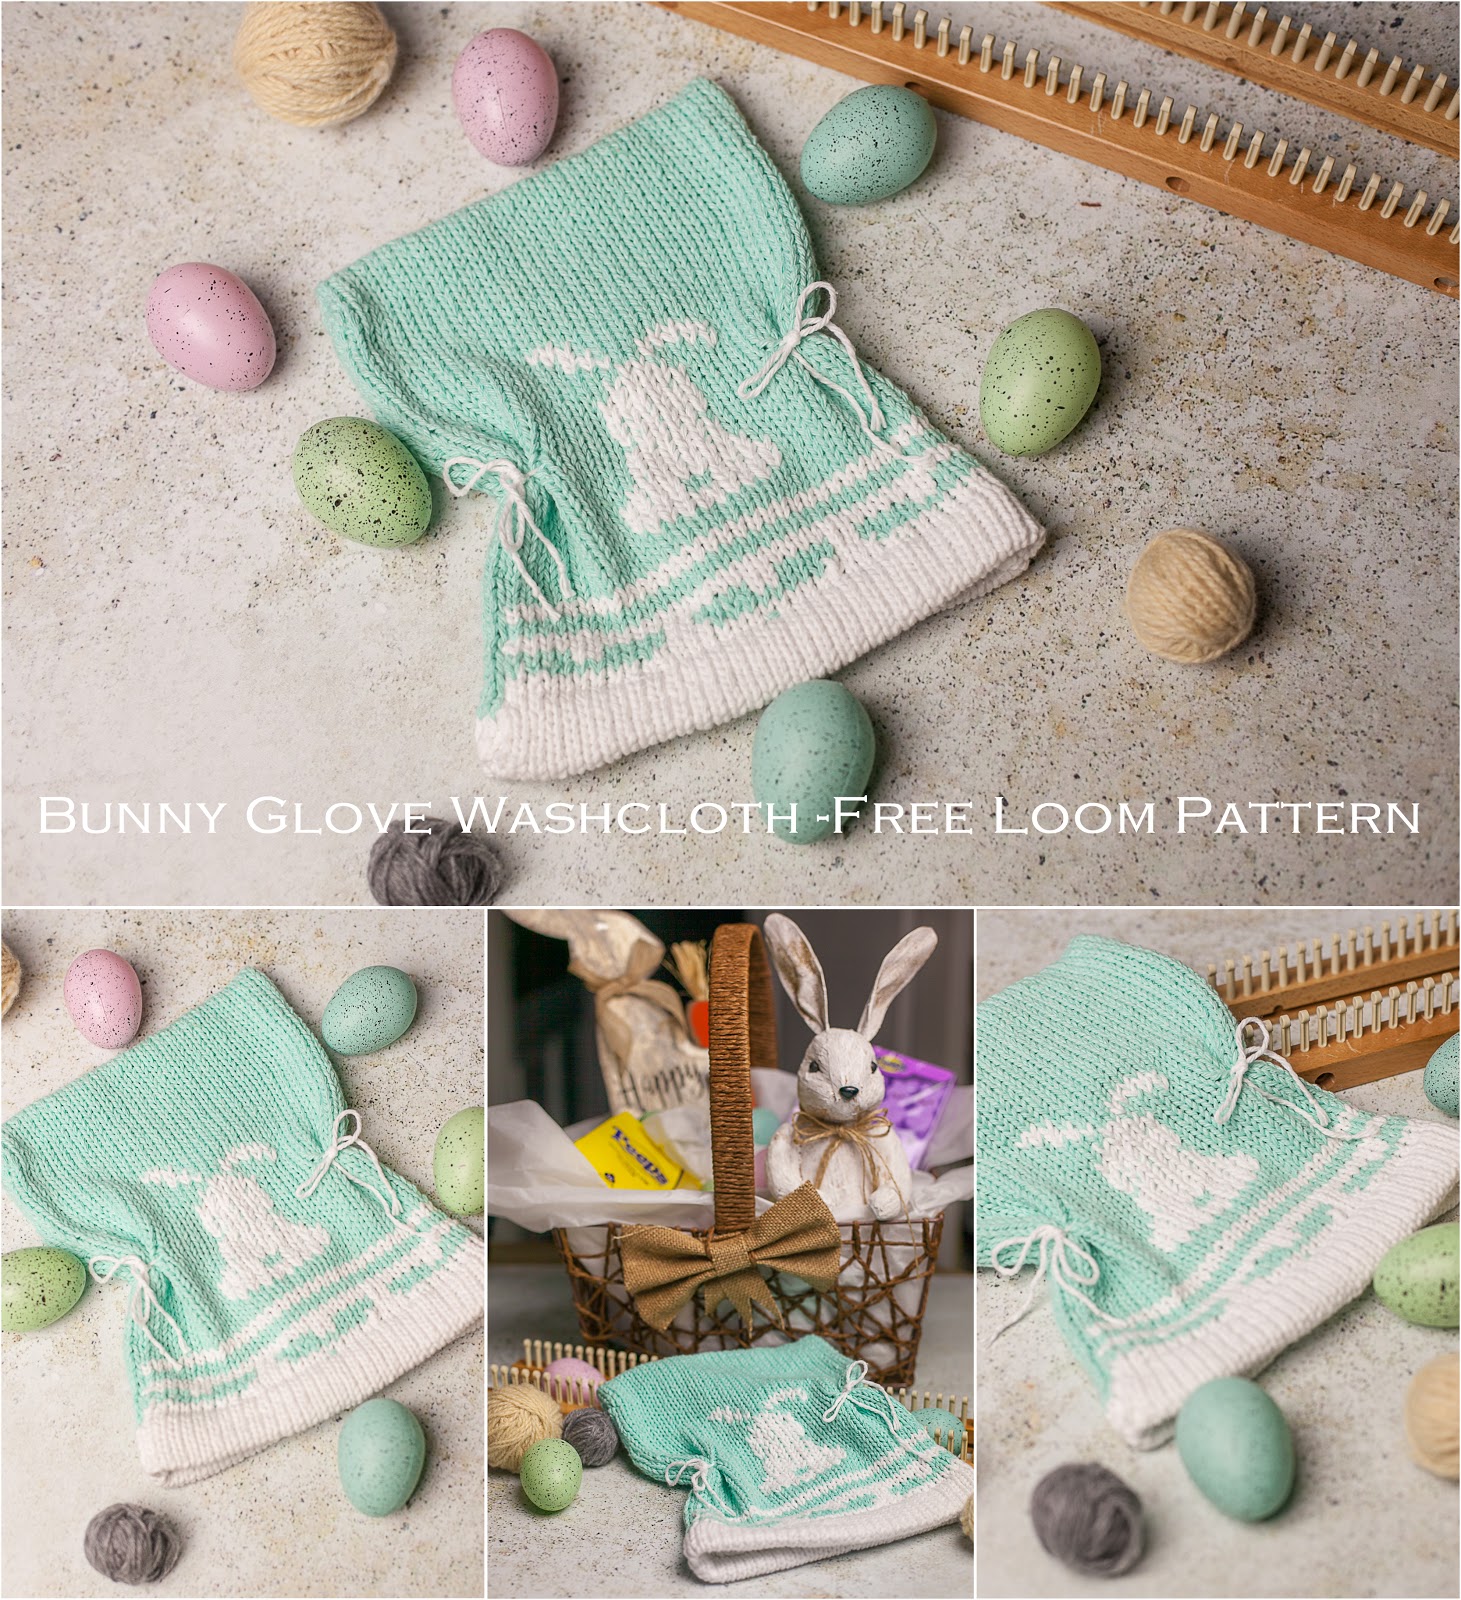
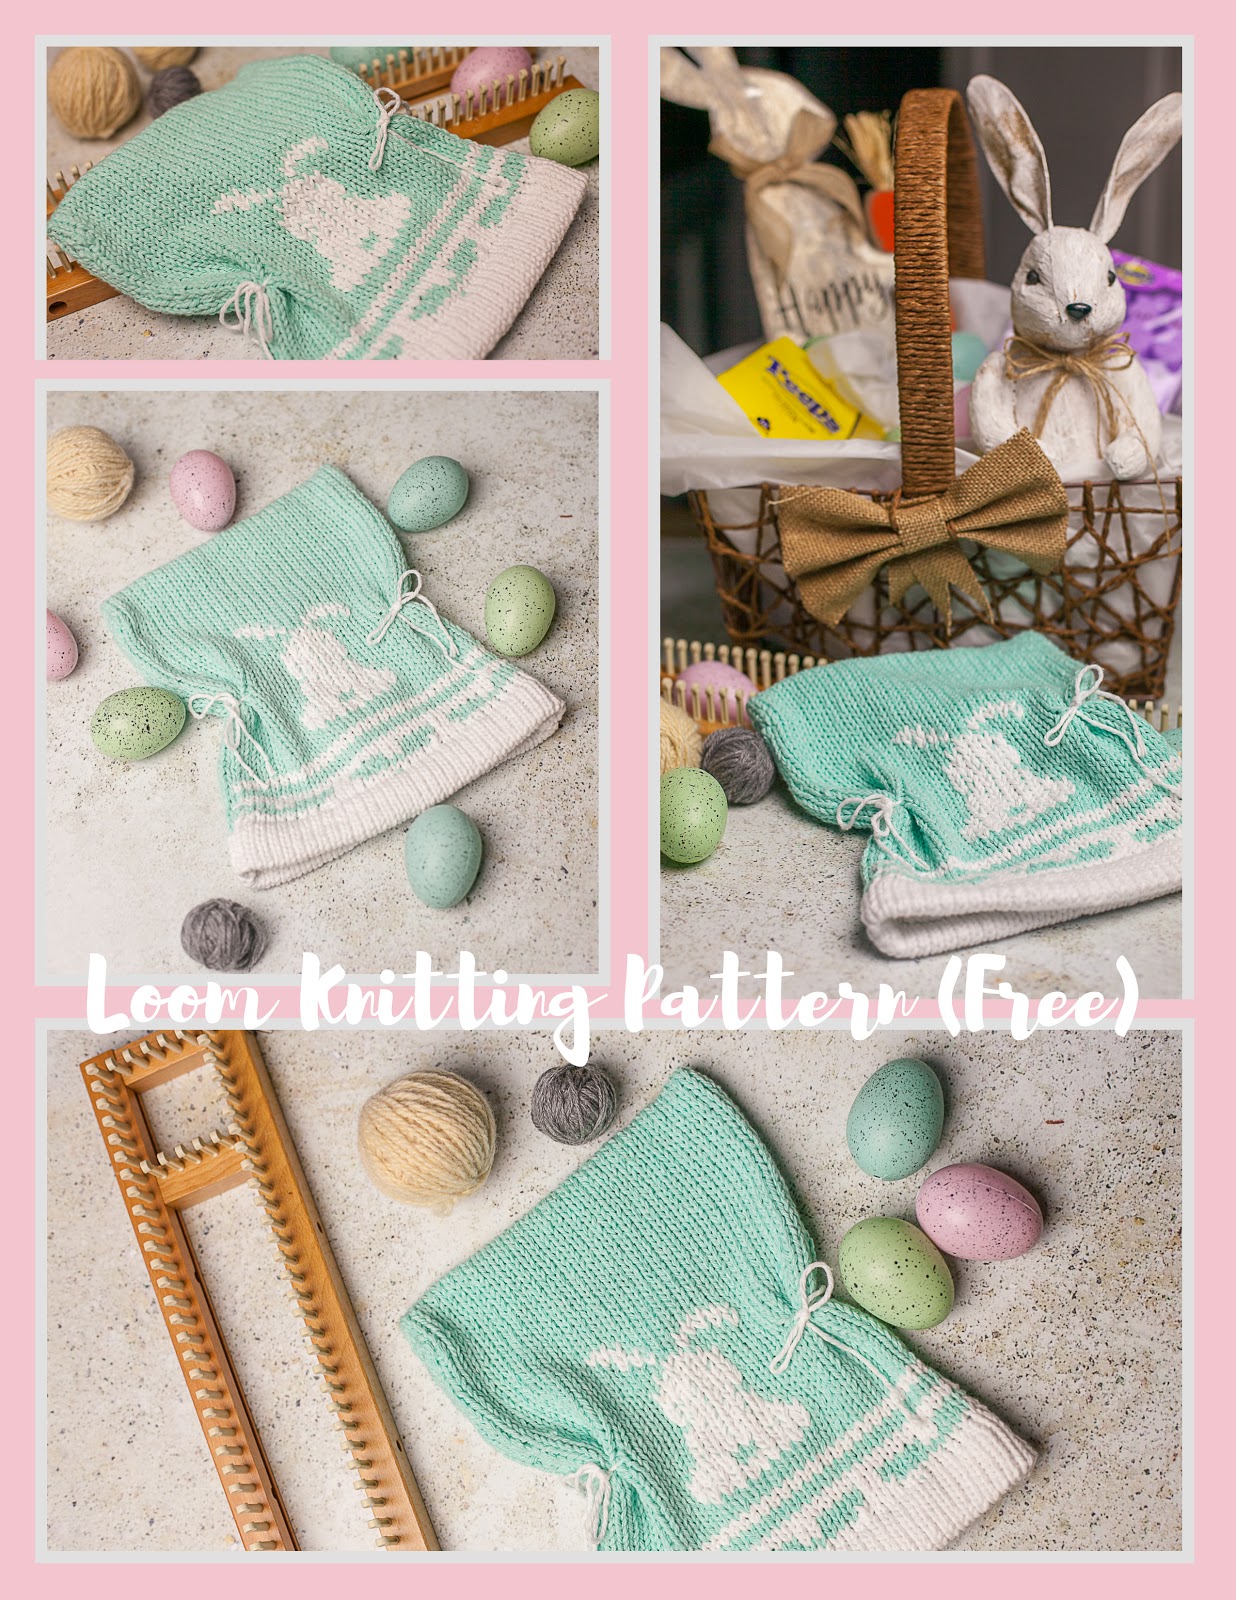
In honor of spring and because my grandchild was coming for a long visit Easter weekend, I've designed this adorable loom knit rabbit washcloth and/or hat pattern. It's two loom knitting patterns in one! Make it into a double thick washcloth (shown in sample pictures) that you can put your hand inside, a single knit regular washcloth (you'll need to add edge sts for this) or knit it into a hat (not shown). You can use baby colors and make it for baby or use greys/bolder blues for a whimsical adult, teen or child. Use your imagination for this one.


Pattern

Level:  Confident beginner

Glossary:  Glossary of Terms and Video Links and Duplicate Stitch

Yarn:  Any #4, worsted weight, 100% Cotton yarn can be used. 1 strand is used throughout all patterns.

Supplies
  • Loom:  3/8" peg spacing round loom with peg numbers divisible by 12 if doing fair isle design just above the hem. If eliminating this design you may knit a hat on any 3/8" peg spacing round/adjustable loom. The single thickness washcloth can be made on a straight loom of the same gauge.
  • Knitting tool
  • Measuring tape
  • Crochet hook
  • Scissors
  • Yarn/tapestry needle
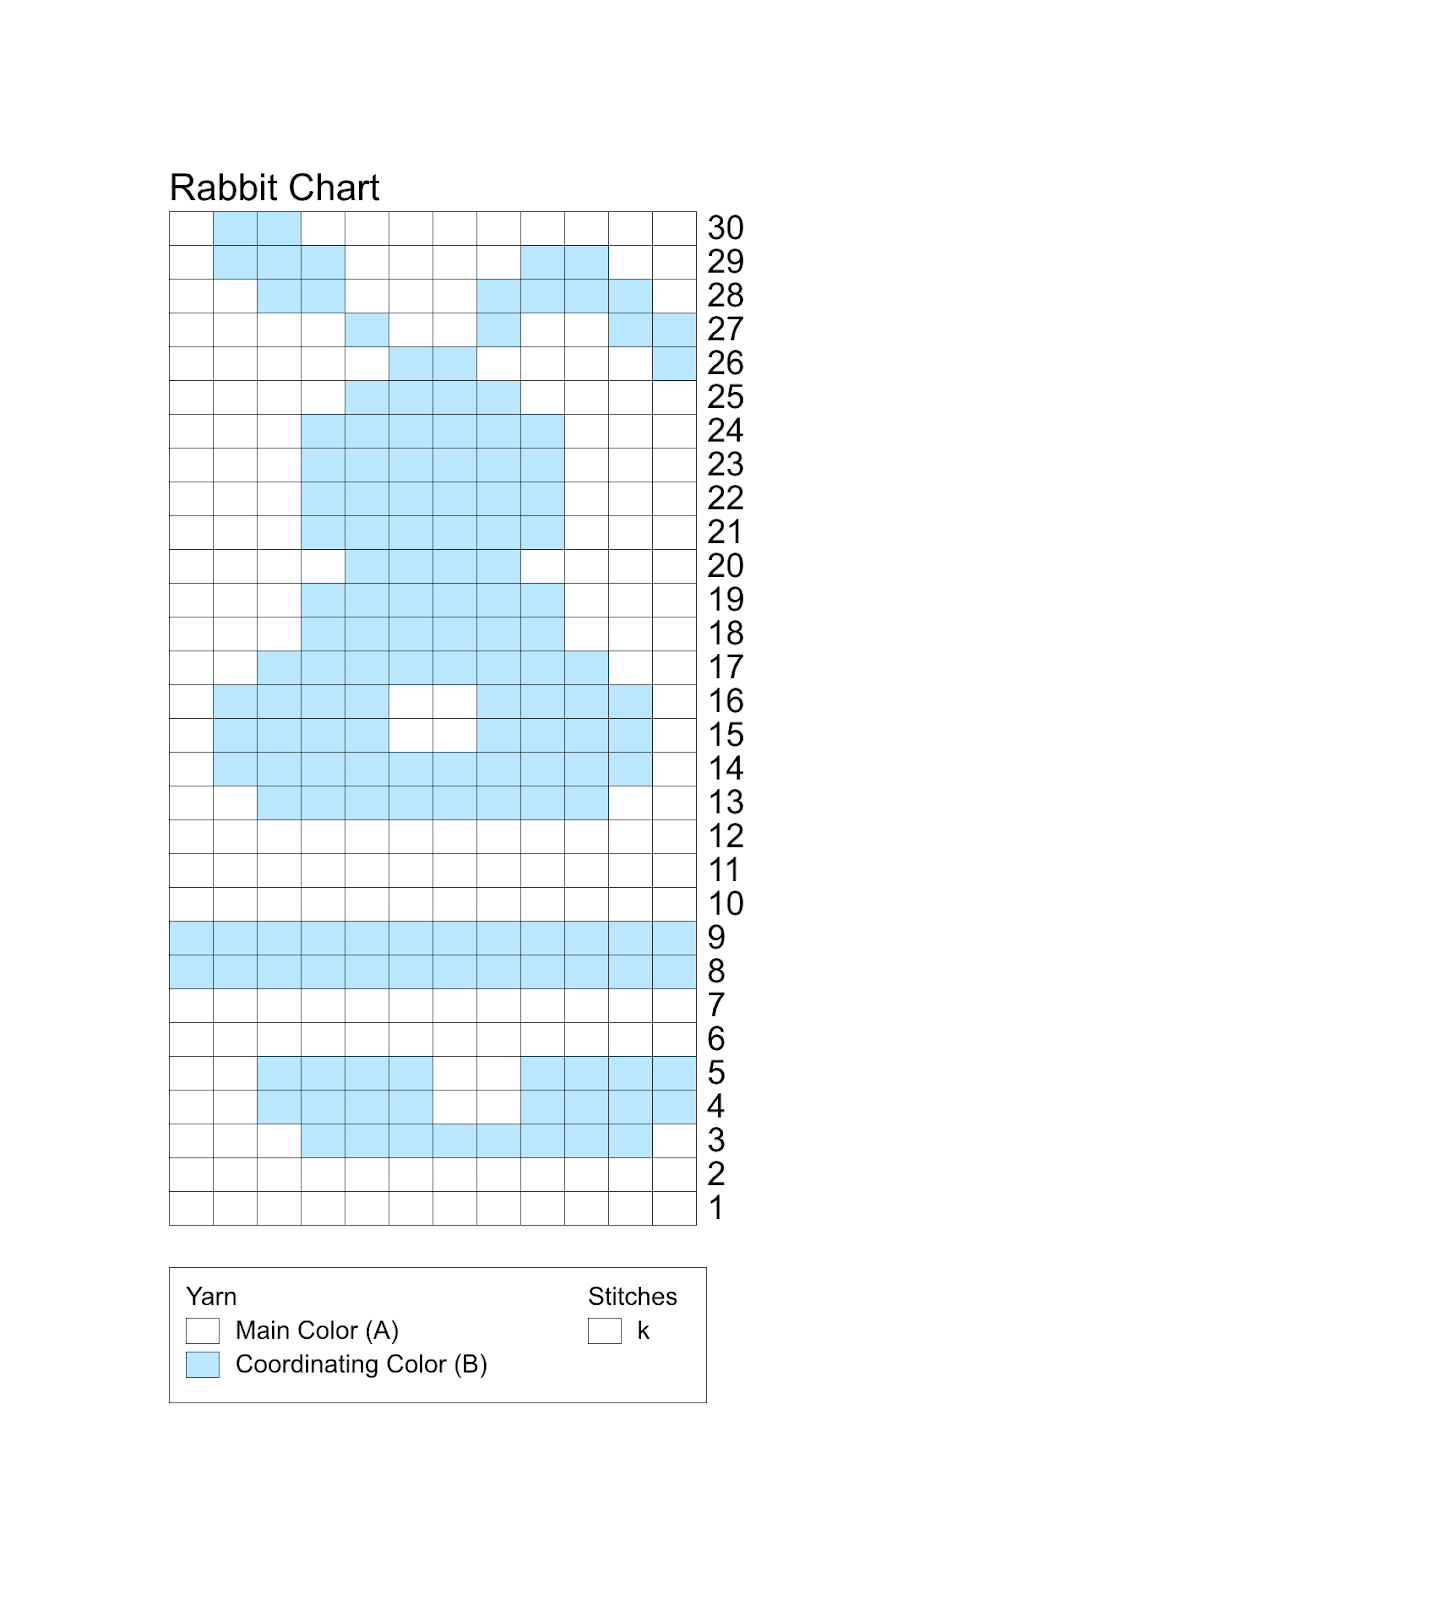
Stitch used:  Regular knit stitch  (e-wrap knit is not recommended). Duplicate stitch was used to knit rabbit design but you may also use Intarsia method, refer to chart only for those rows if using Intarsia to knit rabbit.


Double Thick Washcloth Pattern

Loom Knit "Bunny Butt" Glove Washcloth

(Sample is of washcloth, hat pattern is below but not shown)


Pattern Notes
  • Washcloth glove is not shaped to the hand, the sides of washcloth can be tied to fit hand for ease of use.
  • The main pattern is written for double thick cloth, knit in the round. If doing a single thickness washcloth you must work off the chart for rows 3-5. The written directions only apply to the double thick washcloth. You will also need to add garter or rib sts on each edge (single cloth), at least 5 sts on each side is recommended to stop curling.
  • For simplicity, the rabbit chart is combined with the Fair Isle chart. They are both worked separately; rows 3-5 of the chart are knit as Fair Isle. The Rabbit can be worked as Intarsia (from the chart only) or Duplicate Stitch. The sample Rabbit was knit using Duplicate Stitch. Follow the links for instructions for both methods.
  • E-wrap knit is not recommended for this pattern. 


Hemmed Border
Foundation round:  Chain CO 72 sts (double thick), 36  + 10 if adding edge sts (single thickness cloth) using B; join to work in the round for double thick and work as flat panel if knitting a single thick cloth.
*Work off chart only if knitting flat for rows 3-5.
Rnds 1-11 (in B):  Knit
Fold up hem by lifting the 1st row of sts up onto the loom.
Rnd 12 (in B):  Knit

Begin Bottom Of Chart
Rounds 1-2: Knit in A.
Round 3: *K1 in A, k8 in B, k3 in A, rep to end of rnd.
Rounds 4-5: *[K4 in B, k2 in A] twice, rep to end of rnd.
Rounds/Rows 6-7: Knit in A.
Rounds/Rows 8-9: Knit in B.
Round/Row 10:  Knit in A.
Repeat round/row 10 until total knitting measures 9 inches for double thick cloth. For single knit cloth, knit it square by measuring your bottom width and knitting to that length.
Bind off using chain one bind off method. Leave long tail if seaming.

Finishing:  For double thick cloth, use mattress seam to close the top of the cloth. Weave in ends. To gather sides of knitting, weave a long piece of yarn in and out of 20 sts total (10 back and 10 front of knitting) and tie ends into a bow, double thick cloth only. Place on row 20 of the chart. Repeat for 2nd side of the cloth.


Knitting chart, rabbit knitting chart, bunny knitting chart, bunny butt, bunny washcloth, knit, knit rabbit washcloth, free loom knitting patterns, loom knit washcloth pattern, free,


Loom knit "Bunny Butt" Hat

Pattern Notes
  • Any round loom may be used if eliminating rounds 3-5 of the chart. If incorporating the Fair Isle design then use a loom with multiples of 12 pegs, 24, 36, 48, etc. 3/8" peg spacing round loom is recommended and stockinette stitch. An adjustable loom was used for sample.
  • Note, Newborn to Baby Hat:  You must eliminate the fair Isle portion and stripes, if your bunny is going to fit on the hat (he's large). Knit this portion in a solid color or you can duplicate stitch the bunny on top of the Fair Isle/Stripe design in a third color so that it stands out.

Hemmed Border
Foundation round:  Chain CO all sts using B; join to work in the round. 
Rnds 1 (in B):  Knit
Repeat rnd 1 until knitting measures 2 - 1/4" For Newborn to child sizes and 3" for teen/adult sizes.
Fold up hem by lifting the 1st row of sts up onto the loom.
Next round (in B):  Knit

Begin Bottom Of Chart (rows 3-5 require a loom with stitch multiples of 12)
Rounds 1-2: Knit in A.
Round 3: *K1 in A, k8 in B, k3 in A, rep to end of round.
Rounds 4-5: *[K4 in B, k2 in A] twice, rep to end of round.
Rounds/Rows 6-7: Knit in A.
Rounds/Rows 8-9: Knit in B.
Round/Row 10:  Knit in A.
Repeat round/row 10 until total knitting measures 5 1/2" (newborn), 6 1/2"+ (for baby), 7 1/2"+ (child), 8 1/2" (teen/adult). Sizes are just suggestions, measuring recipients head is recommended.
Bind off using gather method.

Finish:  Weave in ends. Use the chart to duplicate stitch Bunny onto the hat.


Do I have to block my knitting really?? The answer is...most of the time if you want them to look their best! You've put hours of love into your loom or needle piece, it's worth the extra hour to give it that final wow. This post will hopefully take the mystery out of blocking and encourage you to make your knits look their absolute best! I'm positive that once you see how beautiful your knits are after blocking, you'll be as addicted to it as I am.

blocking knits, how to block knits, how to block loom knits, loom knitting, loom knitting tutorial, tutorial

What's blocking?

Blocking is the process of wetting fibers and gently reshaping them to the desired measurements.


Why do I want to block my knitting?

Blocking is used to shape a garment, help it lay flat and straighten out your stitches so that they look neater. It gives your knits a professional, finished look. Have you ever wondered why professional knitters stitches always look straighter and their edges are neat and crisp? It's because they took the time to block their finished projects.

Knitted lace and eyelets are particularly responsive to blocking and the stitches will open up, lay flat and reveal the beautiful pattern in the fabric. I always open up my eyelets a little extra with pins to make them "pop".


What types of fibers should be blocked?

All natural fibers, wool, cotton, alpaca, hemp, etc. and blends of these fibers. If it comes from a plant or animal you can block it. Even when natural fibers are blended with acrylics they will benefit from blocking. See below if you are interested in blocking acrylics/synthetics.


Do I have to block my knitting every time I wash it?

Unfortunately yes! Blocking of natural fiber is not permanent and there are even soaks that can shrink an overstretched wool garment back into shape.


Should I block acrylics/synthetics?

I do but this is widely debated. Acrylics are plastics and usually will not respond as well to wet blocking. I have successfully been able to even out my stitches and get a better "lay" of the fabric. For this reason, I often wet block my acrylics to set my stitches and make them appear neater. Try it and see what you think!

You can use moisture and heat (steam) to "kill" an acrylic piece. A "killed" piece will be limp as the fibers have melted together (it's plastic and plastic melts when heated). This method is not reversible and I would proceed with caution. Usually, an iron is set to steam and held inches away from the knitted fabric until you see it begins to lay. Practice with a test swatch before attempting this on a finished object. I'm not a fan of this method as it is easy to ruin the fiber. Use your own judgment.

What tools do I need to start blocking?

The picture below shows the most common tools used when blocking knits...
blocking knits, blocking tools, how to block knits, how to block loom knits, loom knitting, loom knitting tutorial, tutorial


From Left to Right (See above picture)
1. Plastic bags used to shape and prevent creases forming on the edges of round items like cowls and hats.
2. blocking wires; used for straight edges.
3.  Blocking Pins to hold wires and edges of stitches in the desired shape.
4. Measuring tape or ruler
5. Blocking Mats
6. Sock blockers (can be found in wood, wire or plastic).

How do I get straight edges?

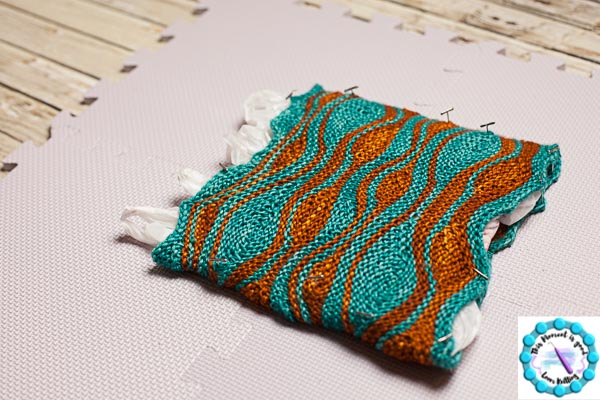
Using blocking wires will help you get straighter edges. The wires are woven through the edge stitches, after soaking/toweling. Blocking pins are then added to gently stretch the knitting to desired dimensions. 
blocking knits, how to block knits, how to block loom knits, loom knitting, loom knitting tutorial, tutorial
Triangles, arcs, s-curves can all be made using wires.

blocking knits, how to block knits, how to block loom knits, loom knitting, loom knitting tutorial, tutorial
The wires are taken in and out of all edge stitches.

blocking knits, how to block knits, how to block loom knits, loom knitting, loom knitting tutorial, tutorial
Continue weaving the wires until you go down the entire length of the knitting. For long projects, you will need several wires.

How do I block odd shapes like cowls, hats and socks?

Using plastic bags or cardboard, cut to shape and then wrapped in plastic wrap like Saran Wrap/Cling Wrap. There are also sock blockers like pictured. These are wonderful for adult socks but not for children's socks. Shape a blocker using plastic bags or plastic coated cardboard for smaller items.

Balloons and small accent pillows (covered in a plastic bag) can also be used to block hats and cowls. Plates are often used to block berets.

blocking knits, how to block knits, how to block loom knits, loom knitting, loom knitting tutorial, tutorial
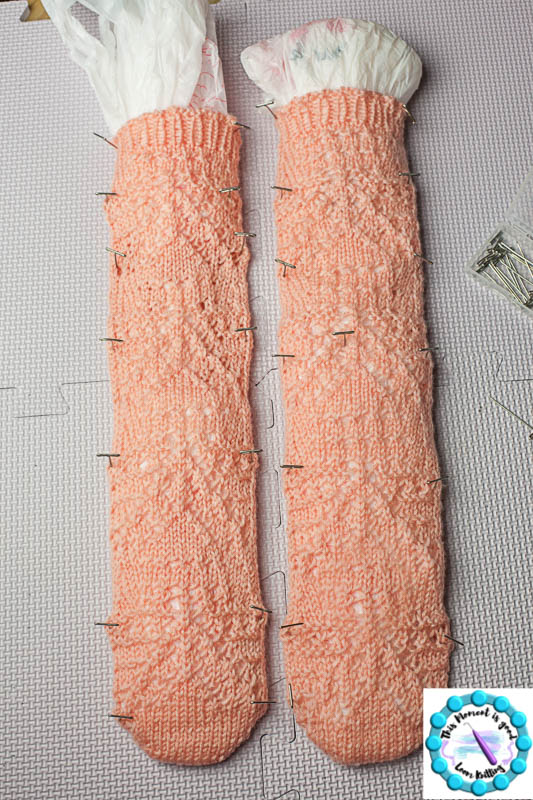
A Lace boot sock on sock blocker.

blocking knits, how to block knits, how to block loom knits, loom knitting, loom knitting tutorial, tutorial
A cowl blocked with plastic bags (to prevent side creases) and pins. The wavy edge has been preserved.

What is the blocking process?

1. Fill up a sink or clean bucket with water. I always use cool water but some use warm. Never use hot water or agitate your natural fibers...they will FELT, and it's irreversible!
2. If you would like to wash your project, use a product like Eucalan. For a new project, I usually just add a teaspoon of gentle fabric softener or hair conditioner.
3. Soak your knitting for 5 to 10 minutes.
4.  Gently squeeze the water out of your knitting.
5. Lay the knitting flat on a thick towel and roll the towel, gently squeezing the excess water out of the knitting. The more water you get out, the faster the knitting will dry.
6. Block using method suitable for your project. 
Note: Be extra careful with ribbing as you want to preserve its' natural springy-ness.


Follow my process as I block lace boot socks...

blocking knits, how to block knits, how to block loom knits, loom knitting, loom knitting tutorial, tutorial
I filled a clean sink with cool water.
blocking knits, how to block knits, how to block loom knits, loom knitting, loom knitting tutorial, tutorial
I added the knits and let soak 5-10 minutes.
blocking knits, how to block knits, how to block loom knits, loom knitting, loom knitting tutorial, tutorial
Then I Added 1 tsp gentle (free and clear) fabric softener.
blocking knits, how to block knits, how to block loom knits, loom knitting, loom knitting tutorial, tutorial
I rolled the knitting and gently squeezed the excess water out.
blocking knits, how to block knits, how to block loom knits, loom knitting, loom knitting tutorial, tutorial
I then rolled the knitting in a towel and squeezed the knitting again.

blocking knits, how to block knits, how to block loom knits, loom knitting, loom knitting tutorial, tutorial
I decided not to use sock blockers for the lace as I didn't want creases along the sides. I lightly stuffed 2 plastic bags in each sock and pinned along sides. I'm not being too precise or overly stretching the knitting as I want to preserve the top ribbing and make sure the socks fit after they dry. I will allow these to dry half to three-quarters of the way then remove them from the blocking material and finish them with a little steam from an iron and a damp towel to protect the wool. Update! This worked perfectly, the lace opened up and the knitting didn't stretch out which is important for socks.

I do every project a little different, shaping it to desired measurements and evening out my stitches. The project usually decides the method used.

Can I steam natural fibers?

Yes, you can achieve excellent finishing results using steam. I usually use this as a finishing method or when I'm in a hurry and need a project to dry faster. There are a couple of ways to steam block

(1) Dampen your knitting using a spray bottle. Place a damp towel over your fiber (not delicates like mohair) and lightly press an iron on the towel allowing the steam to go through the towel. Emphasis on lightly, you aren't trying to iron your work, just steam it. A flat piece is not attractive in knitting. Work quickly and check your project often. 

(2) Pin your piece to an ironing board or thick towel. Hold the iron 1-3 inches away from the fiber and press the steam button while floating over and above your knitting. Proceed in this manner until knitting is completely damp.

Exciting news! If you are looking for the patterns for the knits you see in this blog post, they will be included in my next book tentatively scheduled for Spring 2019. Happy loom knitting-Nicole


blocking knits, how to block knits, how to block loom knits, blocking tools, blocking supplies, loom knitting, loom knitting tutorial, tutorial

Hello loom knitters and welcome to our color series! This is topic 6, Color Inspiration.

Color is everywhere...it affects our mood, inspires us and makes us feel more creative!


I'm sad to say this is the 6th, and last in a series of blog posts and accompanying videos, pictures/charts discussing different methods of using color in your loom knitting. I've had so much fun writing about this topic and hope you have found these posts helpful. This post is about finding color inspiration.


The series will include

(the current topic is highlighted below)


  • Topic 1: Beginners! Simple Colorwork on the loom including, self-striping, variegated yarn, stripes and color changes, vertical and horizontal colorwork (post link)
  • Topic 2:  How to fix the jog when knitting stripes!
  • Topic 3:  Fair Isle loom knitting
  • Topic 4:  Intarsia on the loom
  • Topic 5:  Mosaic & Slip Stitch Loom Knitting
  • Topic 6:  Finding color inspiration
  • All the topics will include pictures/video links, charts where applicable.

Do you wonder why some designers knits look so good and have that instant "wow" factor? 

Besides all the attention to detail, it may just be their color choices. Most designers study color or have a "natural eye" for how colors compliment or contrast each other.

Do you feel that you struggle with choosing colors?

Have no fear, there are ways to cheat if you don't have a "natural eye" for combining colors. You can use the color wheel, explained below, find color inspiration in your environment or look for color boards on sites like Google or Pinterest.


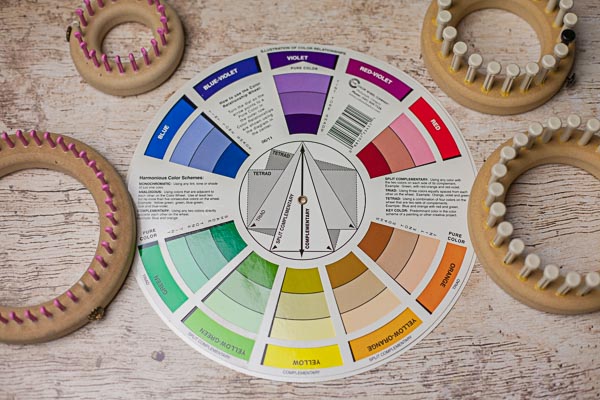
The color wheel explained!


Finding complementary colors

choose a color on the wheel and draw a straight line across from it and that is the colors complement. If you choose the colors next to the complement you will get a more subtle look. This combination can be quite dramatic like white and black. 

Finding Analogeous Colors

These colors are found by choosing a color and then selecting the colors on either side of that color. These colors create monochrematic looks.

Finding triad Colors

Find a color on the color wheel then draw a triangle to find that colors secondary colors. Colors must be equally spaced so there are only 4 combinations. This creates a vibrant look to your color scheme.

Note:  If this seems like a lot to remember than you can buy a color wheel like the one I use and it does all the work for you just by dialing the wheel, so easy!


Front of wheel


Back of wheel

Finding color inspiration in your environment!

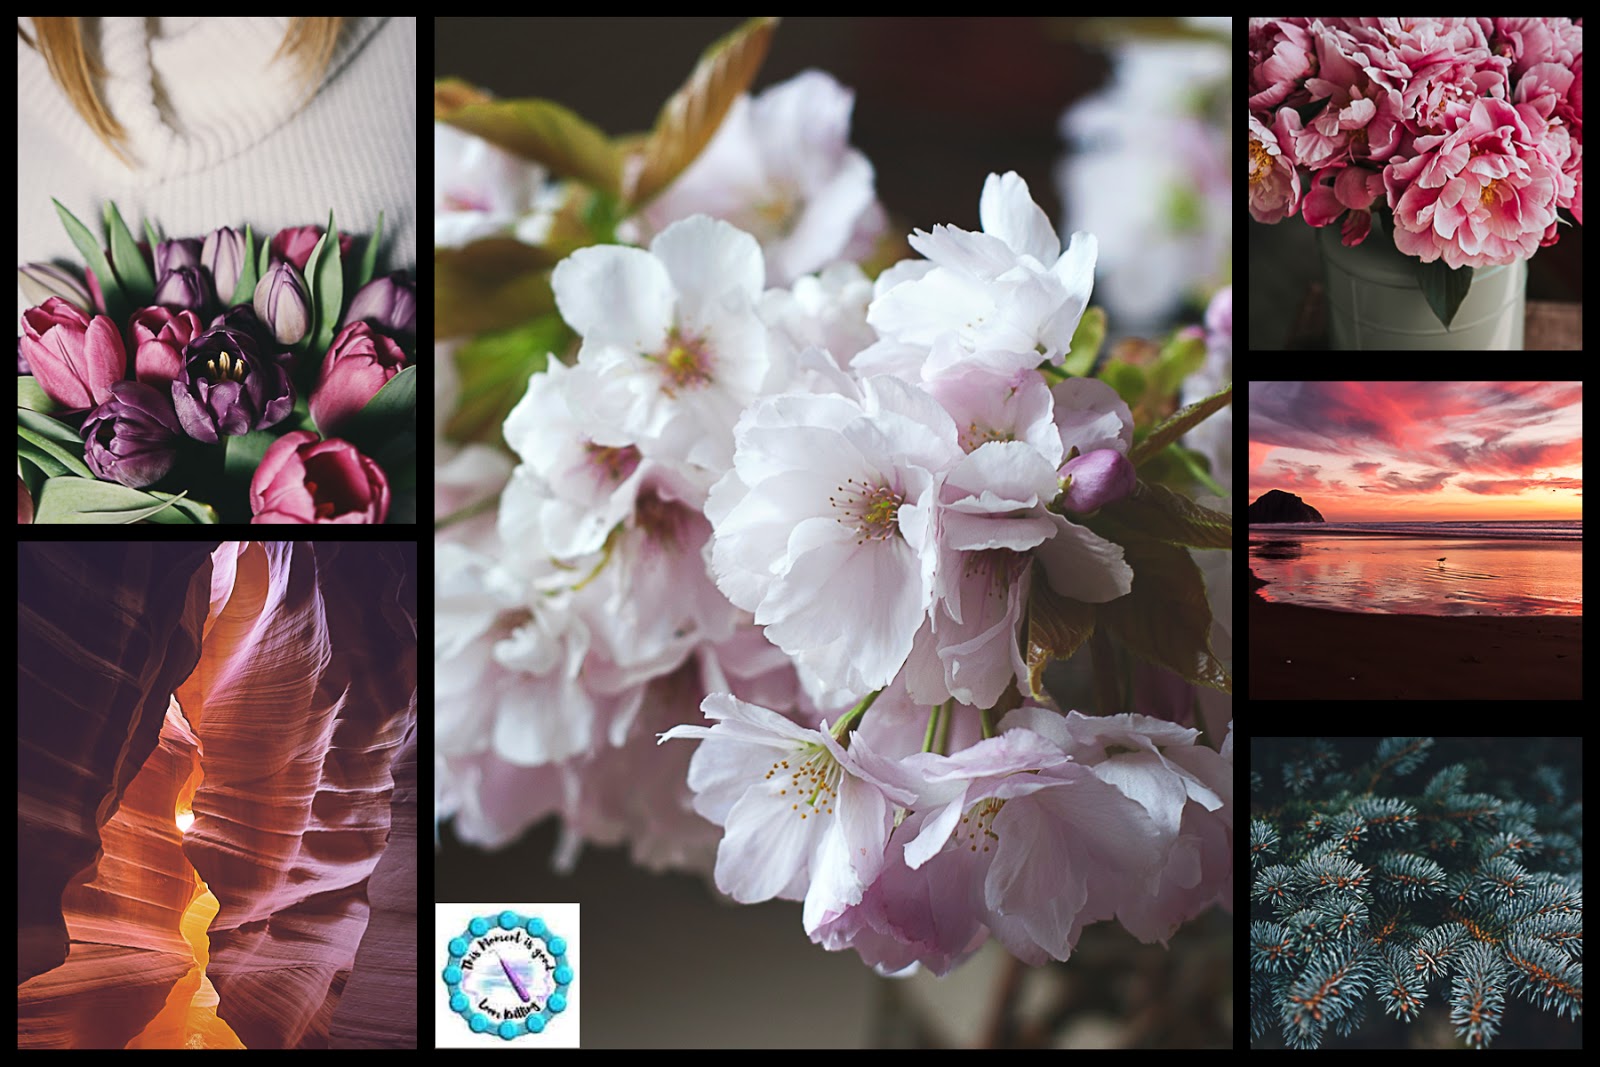
Have you seen a bouquet of flowers that you just love? It's probably because the colors blend perfectly to your eye. Maybe it's a subtle blend or vibrant contrast, either way it appeals to you. Take a picture of it and find yarn in those colors. This method works for almost anything. Before painting a room, I find fabric I love, cut a swatch and pick my paint colors from that swatch. Since I already know I like the color combination, I don't worry about liking it within my room. 

Choosing color combinations from objects and pictures you already love, pretty much insures success!

Subtle natural color combinations

Vibrant color combinations

Monochromatic colors


Is there a board above that you are particularly attracted to, then you can use that as a start for choosing color combinations for your next project. Or, better yet, make your own boards using free picture editing software. These are fun to make. How cool would it be to make a blanket using the colors from your travel photos?


Another trick, use a color board found online or make your own!

Pinterest and Google are loaded with these. Use the search term "color palettes" and you'll find beautiful images and colors selected from those images.

Below are examples that I made up from pictures I love. On the left is the picture and on the right are 3 colors chosen from that picture using an eyedropper tool within my photo editing software. This is an easy and fast way to create color combinations that work together!


Isn't it amazing how the colors just work together? When objects and landscapes are visually appealing then their color combinations are also. This is where the saying "pretty as a picture" must come from!

OK, it's time to bring this color series to its' conclusion. Thank you so much for following along with me. I hope you have learned a lot about working with color in your loom knitting and beyond. Have a great day!


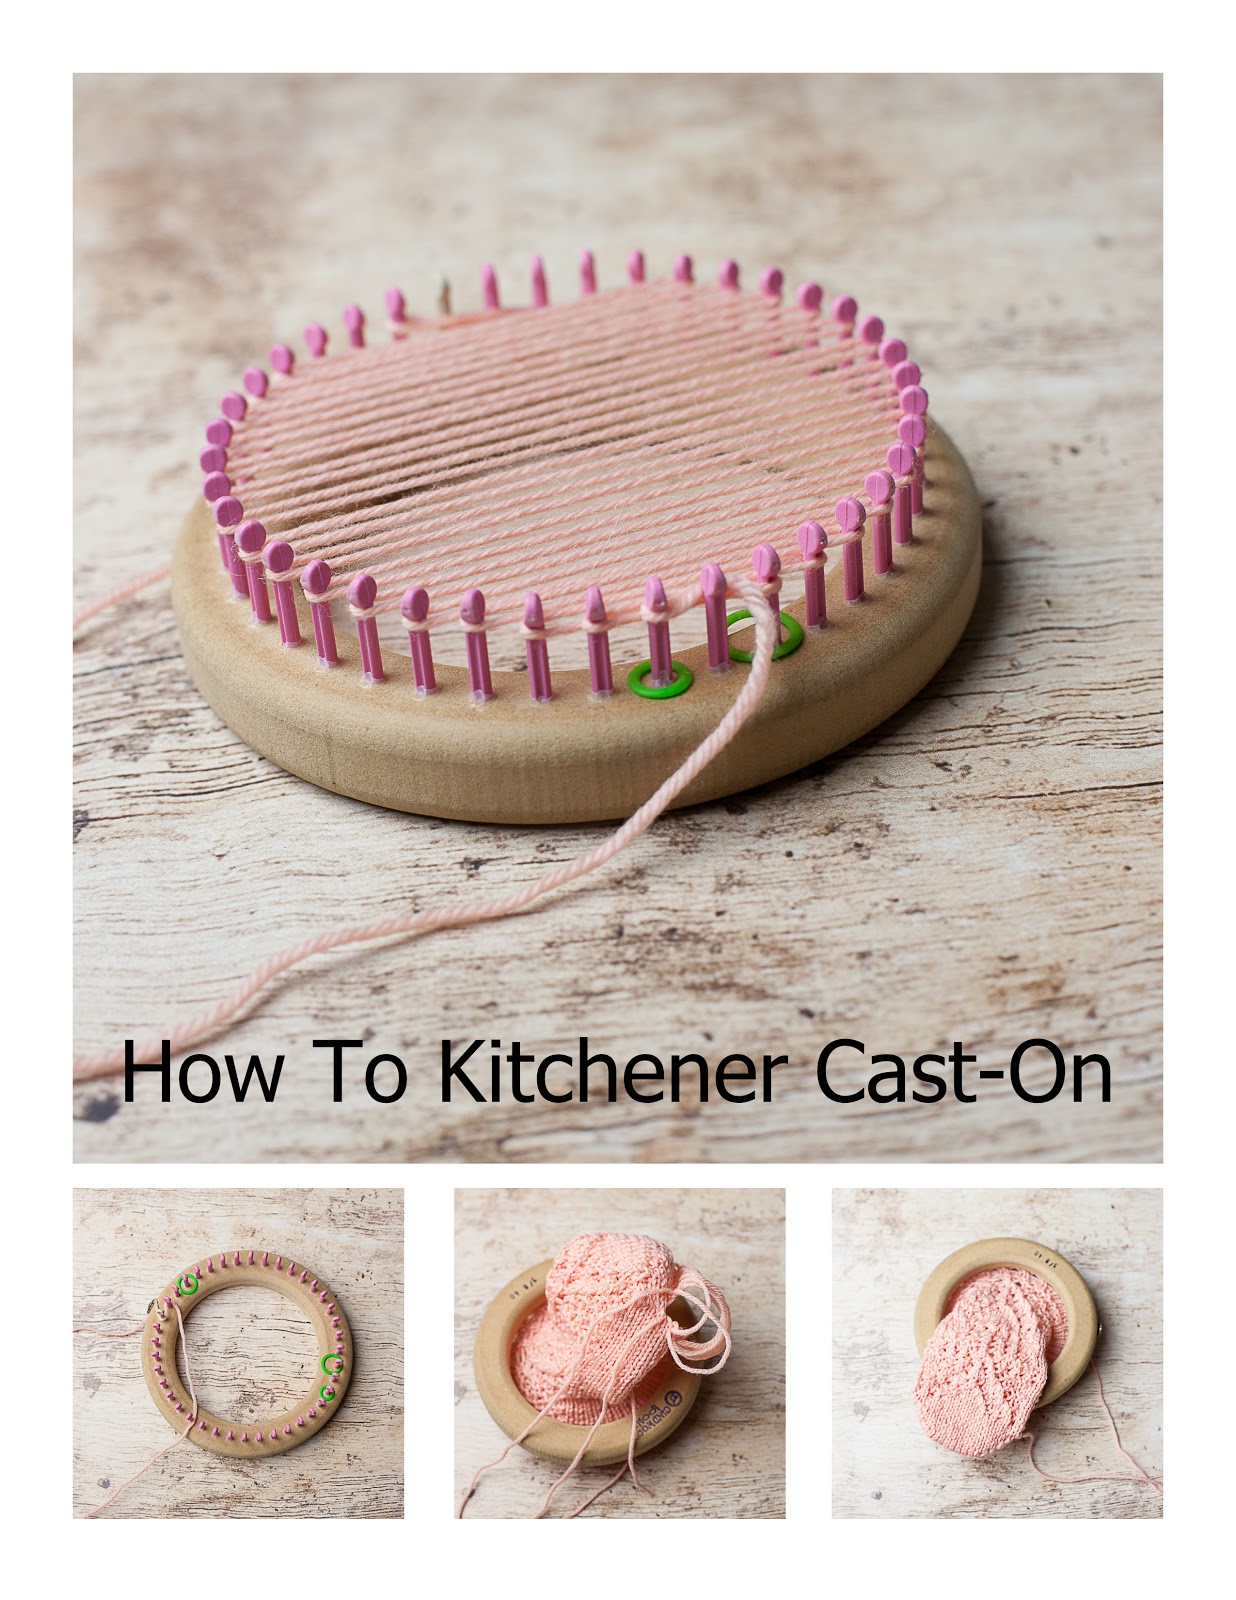
Do you want to do socks from the toe-up but not have to do a provisional cast-on? The easiest way is to do a Kitchener cast-on right on the loom. I'm not sure who was the 1st to come up with this technique but there are quite a few videos online for this cast-on. I thought I'd do a quick pictorial for those who prefer them or do not have time to watch the videos. I will not be making a video since I think there are already enough quality videos out there explaining this technique.

Pros of this cast-on: It's fairly easy to do and usually produces an almost seamless Kitchener join.

Cons of this cast-on:  It blocks the bottom of your loom particularly after pulling it closed making it hard to grip and control your loom. 

One note about this cast on, make sure you slowly and carefully tighten your loops as the yarn can become easily tangled as it's being pulled. The natural barbs on some fibers like wool, mohair, alpaca, etc. can grab and make pulling this cast on a little difficult as these fibers like to stick together (dry felt) when worked too harshly. Be gentle, work slowly and you should be fine.


Also...If the stars align, I'll have a provisional cast-on tutorial for speed loom knitters like me that do not like the bottom of their project blocked by this cast on. I grip my loom from the bottom, holding the back of my working yarn with one hand and knitting with the other. I don't work on top of the loom like I see many loom knitters. A provisional cast-on allows you to do Kitchener on live stitches using knitting needles later. There is also a way to Kitchener from the provisional cast-on without transferring to needles.

Update:  Brenda Myers has been nice enough to share that she is the developer of this cast-on. You can see what she had to say about it in the comments below this post. 
Kitchener cast on, loom knitting, loom, how to loom knit, tutorials, pictorials, Kitchener Stitch, Kitchener seam, Toe-up socks,


Kitchener Cast-On

Uses:  Toe-up Socks & Slippers and Finger-up Mittens, etc.

Kitchener cast on, loom knitting, loom, how to loom knit, tutorials, pictorials, Kitchener Stitch, Kitchener seam, Toe-up socks,
Secure the yarn on the holding peg then take it around the 1st peg on your loom.

Kitchener cast on, loom knitting, loom, how to loom knit, tutorials, pictorials, Kitchener Stitch, Kitchener seam, Toe-up socks,
Next, take it around the last peg on the loom, then peg 2, then the 2nd to the last peg and so on...Always going to the outside of the peg.

Kitchener cast on, loom knitting, loom, how to loom knit, tutorials, pictorials, Kitchener Stitch, Kitchener seam, Toe-up socks,
It should look like this when you are finished. The last peg wrapped will need to be held in front of the peg when locking it in on the next step.

Kitchener cast on, loom knitting, loom, how to loom knit, tutorials, pictorials, Kitchener Stitch, Kitchener seam, Toe-up socks,
Using the Regular Knit Stitch, lock in your wraps by knitting one row. You can then begin decreasing and increasing the toe of your sock. The toe is worked on one side of the loom and the heel is worked on the opposite side.


Kitchener cast on, loom knitting, loom, how to loom knit, tutorials, pictorials, Kitchener Stitch, Kitchener seam, Toe-up socks,
Once your sock is long enough and beginning on the side opposite the holding peg, tighten each loop one by one.

Kitchener cast on, loom knitting, loom, how to loom knit, tutorials, pictorials, Kitchener Stitch, Kitchener seam, Toe-up socks,
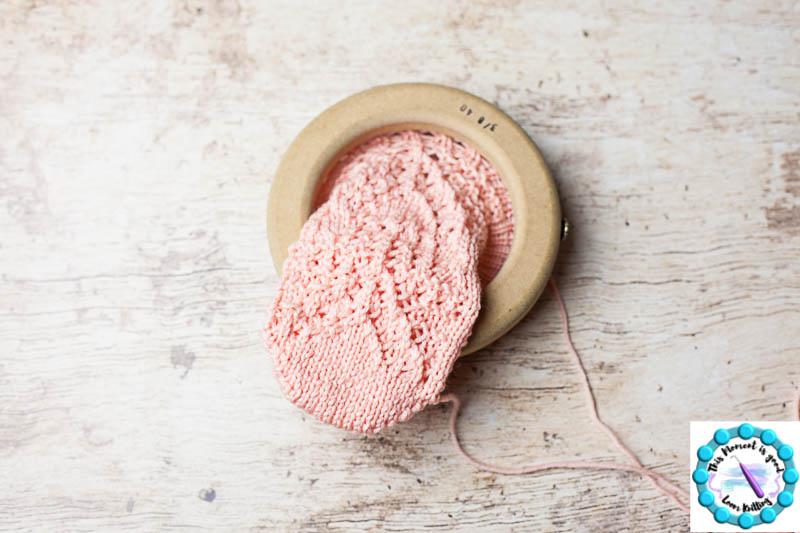
The bottom of your sock will look like this. It's almost seamless. After blocking you won't be able to see it.

Kitchener cast on, loom knitting, loom, how to loom knit, tutorials, pictorials, Kitchener Stitch, Kitchener seam, Toe-up socks,
This is the front, no seam!
It's as easy as that! Happy Looming...
Kitchener cast on, loom knitting, loom, how to loom knit, tutorials, pictorials, Kitchener Stitch, Kitchener seam, Toe-up socks,


Hello loom knitters and welcome to our color series! This is topic 5, Mosaic & skip/slip stitch colorwork.

Color is everywhere...it affects our mood, inspires us and makes us feel more creative!


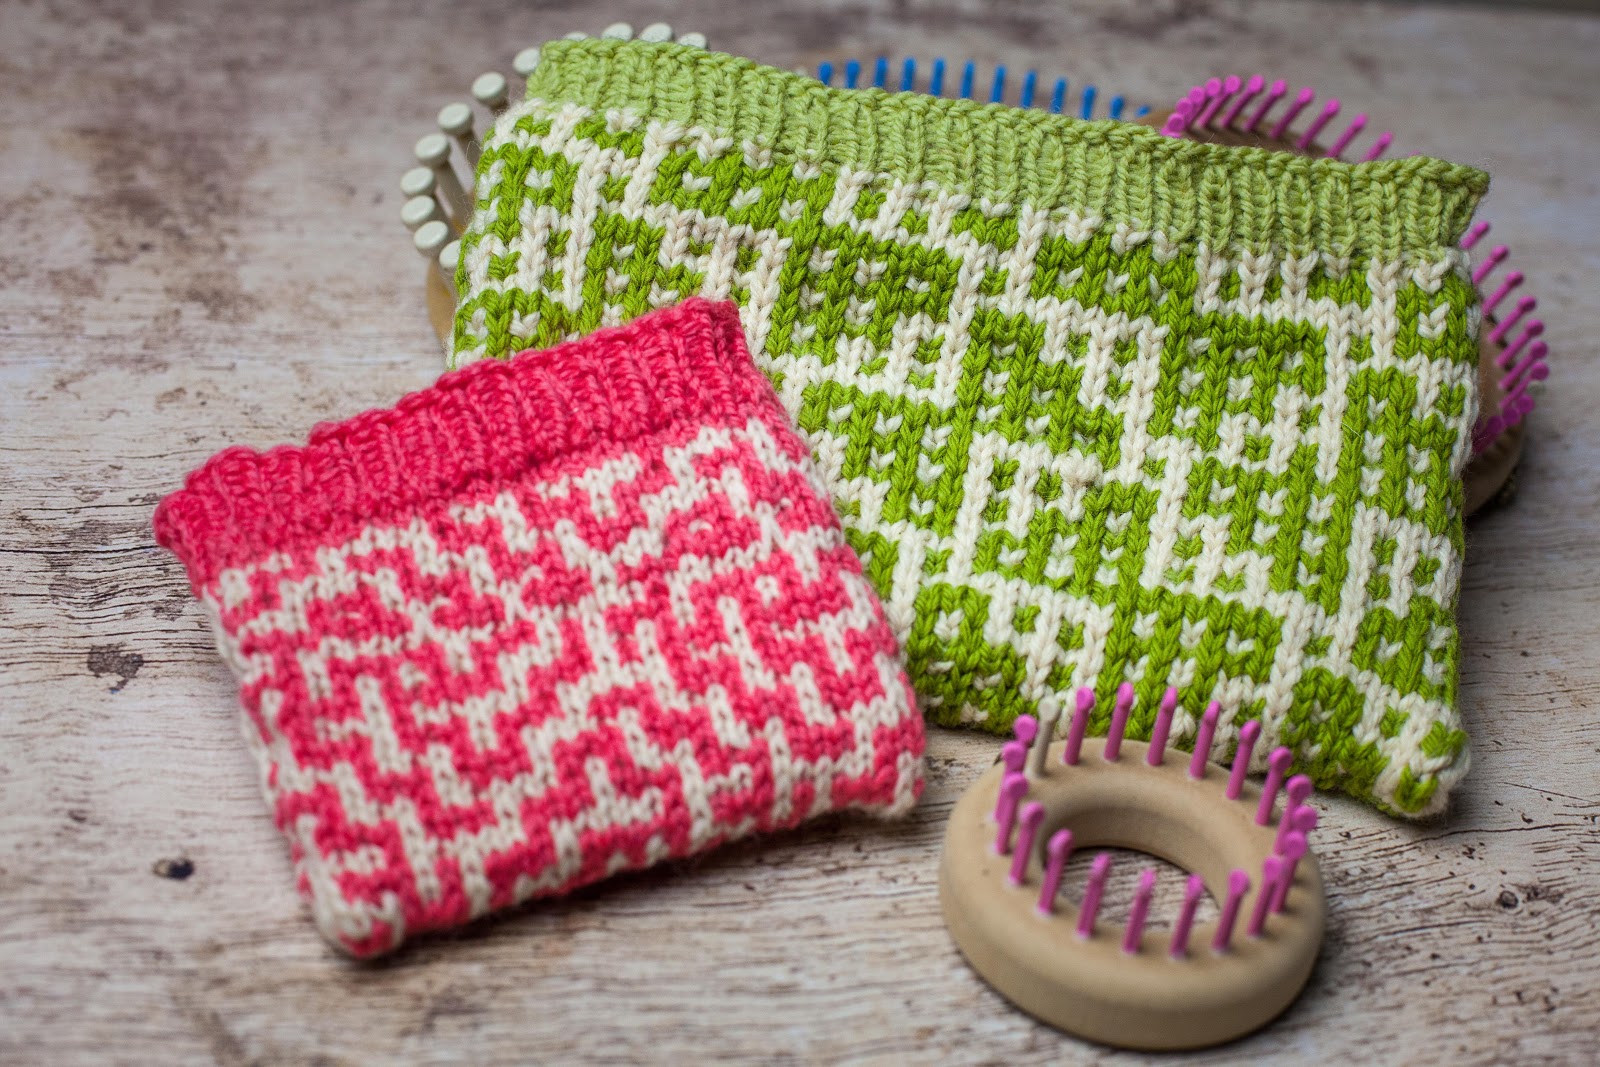
Above loom knitting Patterns Can be found Here!


This is the 5th in a series of blog posts and accompanying videos, pictures discussing different methods of using color in your loom knitting. Check back for future articles or subscribe to our mailing list to be the first notified of the new posts in this series. This post is about Fair Isle loom knitting.


The series will include

(the current topic is highlighted below)


  • Topic 1: Beginners! Simple Colorwork on the loom including, self-striping, variegated yarn, stripes and color changes, vertical and horizontal colorwork (post link)
  • Topic 2:  How to fix the jog!
  • Topic 3:  Fair Isle loom knitting
  • Topic 4:  Intarsia on the loom
  • Topic 5:  Mosaic & Slip Stitch Loom Knitting
  • Topic 6:  Finding color inspiration
  • All the topics will include pictures/video links, charts where applicable.


What is Slip/skip Stitch colorwork?

Slip/skip stitch colorwork is a technique used to make different color placement effects in knitted fabric. By skipping stitches/pegs, you can create beautiful waves, blocks, mosaics and color effects.  

How do I do a skip/slip stitch on the loom?

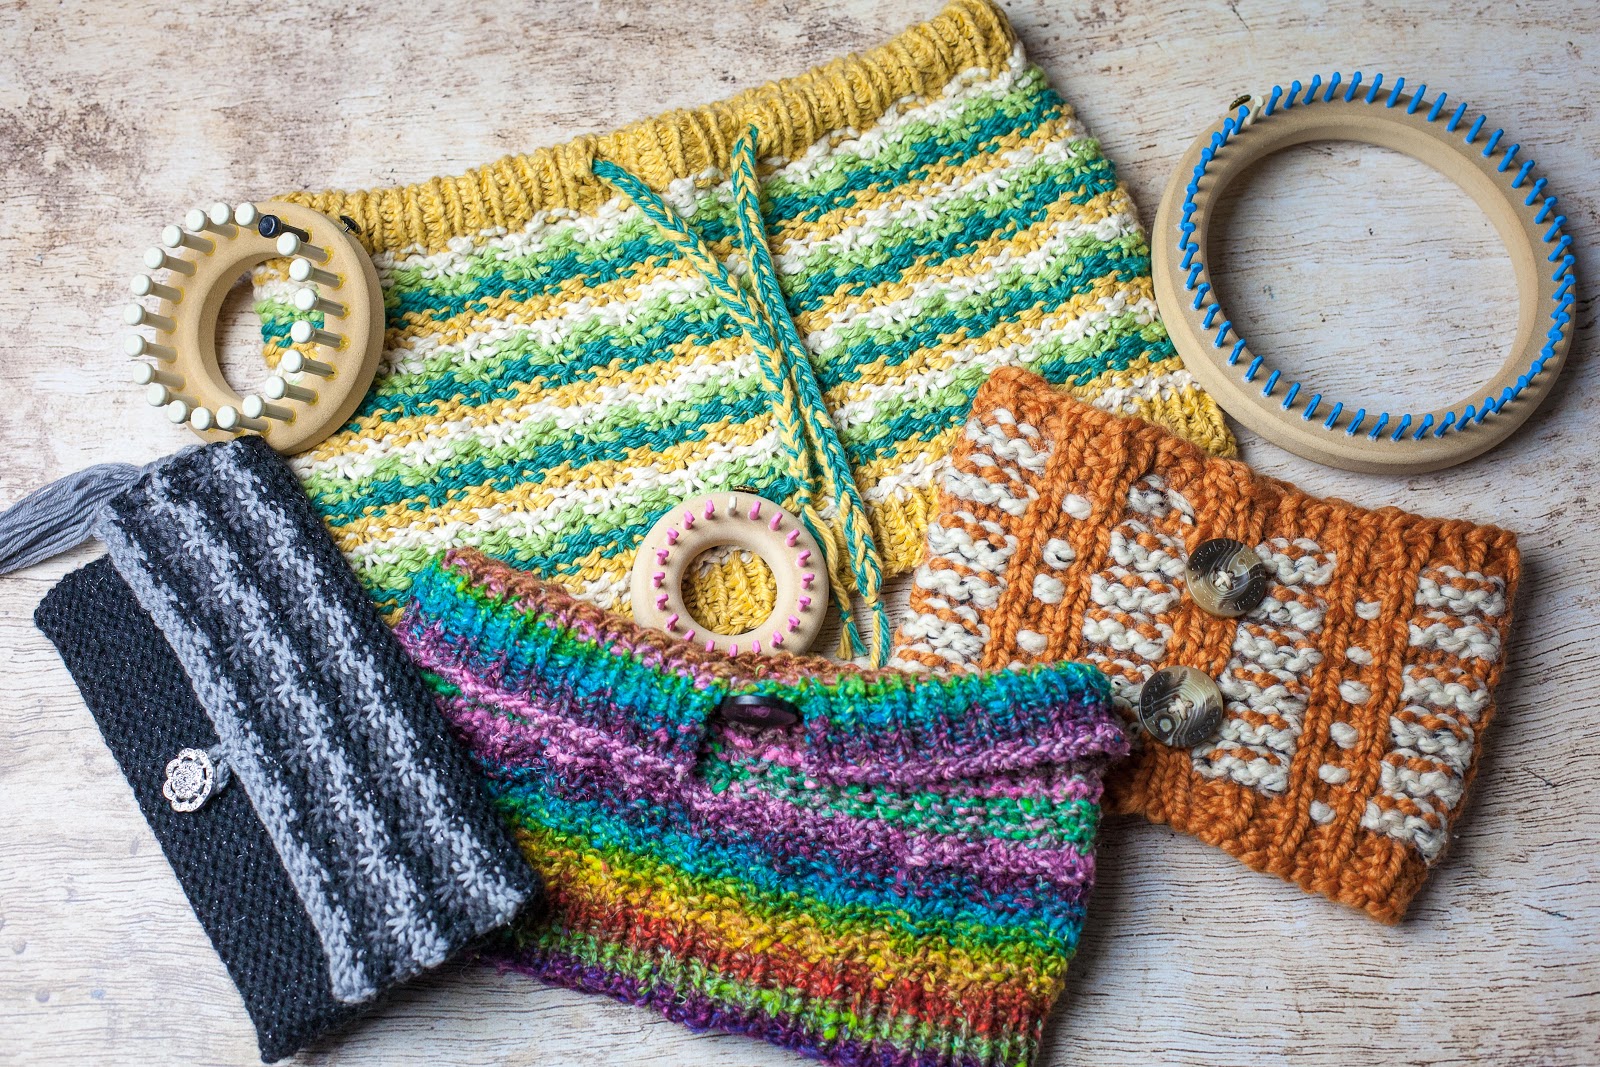
You take the yarn behind the peg(s), ignoring 1 or more sts/pegs. It will usually be written like this, skip1 wyib, slip1 wyib, slip1, skip1 or some variation of those. Pegs can also be skipped/slipped by placing the yarn in front of the work, adding texture, but for the purposes of todays color series we are only referring to skipping the pegs with the yarn in back of the peg. The pictures below show examples of slip/skip stitch color patterns. All the projects below were done on the loom. Video/ Skip/slip stitch on the loom


What is Mosaic colorwork?

Mosaic colorwork is a pattern created in the knitted fabric using slip/skip-stitch using 2 colors. 2 different strands of yarn are used but only 1 is knit with at a time. Two rows are worked in one color, then 2 rows are worked in the other color and so on.

Is Mosaic colorwork hard to do on the loom?

No, it is well adapted for the loom as the loom knitter never has to handle more than one color at a time. Beginners can create exciting, complex appearing designs with very little experience. If you know how to read a pattern/chart, do the knit stitch (k) and skip a peg with the yarn in back (skip1 wyib), then you are ready to do mosaics!


What are the principles of Mosaic colorwork?

  • Mosaic colorwork is simple enough for a beginner! It's also faster than Fair Isle/Stranded colorwork.
  • Skills needed:  Knit stitch, chart/pattern reading, skip/slip stitch with yarn in back and working with 2 colors (similar to making stripes as each color is worked separately)
  • Always work with two colors. Although you can add other colors in different sections as was done in this beautiful needle knitting blanket pattern. See the Pattern!
  • Work each color for two rows.
  • You will work 2 identical rows for each color. Example; row 2 will be worked identically to row 1, with the same sts being skipped and the same stitches being worked. The patterning will usually change with the color change.
  • Always skip or slip your stitches with the yarn in back of the peg (wyib).
  • Mosaics may be worked on any number of stitches, although your patterning may be slightly off center.
  • Because 2 rows are identical in mosaic knitting, the charts are usually compressed (but not always, if the designer wishes to help out beginners by showing the entire pattern) to show every other row. Each single horizontal row represents 2 rows of knitting.
  • There is no stranding (locking in floats) in Mosaic colorwork. Using skip/slip sts eliminates this need. Occasionally, you will see a mosaic pattern with longer color gaps of more than 4 sts, in this case your knitting will be neater if you lock in your floats.

Are there resources for mosaic charts?


  • Yes, Barbara G. Walker has an entire book dedicated to Mosaic Patterns/charts, it's awesome.  See the Book!
  • Here is a cool resource for creating your own Mosaic charts Go to link! There are rules to making your own Mosaic patterns, this makes it easy.
  • Detailed and interesting article on Mosaic knitting (needle knitting is not much different in colorwork except that we don't have a wrong side to our knitting) Go to Link!


How do I read a mosaic chart?

Lets walk through a couple rows of a Mosaic chart! All Mosaic charts are worked in the same manner.


Chart explanation:  Mosaic charts are different then Intarsia or Fair Isle charts. Each row counts as two rows. Row 1 is actually row 1 and 2. Rows 1 and 2 are knit in the steel color. Rows 3 and 4 (the next rows on the chart, written as just row 3) are knit in white only. Note that the chart is worked differently in the round or if flat knitting. The selvage sts are eliminated when knitting in the round.

Flat Knitting (multiple of 6 sts + 2)
Rows 1 and 2 (right to left, knitting flat):  K1, *K2, skip1 wyib, k3, repeat from * to last st, k1 (in color Steel only).
Rows 3 and 4 (left to right, knitting flat):  K1, *skip1 wyib, k5, repeat from * to last st, k1 (in color white only).
Keep working in this manner until end of chart, then repeat, changing colors every 2 rows.

In the round (multiple of 6 sts)
Rows 1 and 2 (right to left, knitting in the round):  *K2, skip1 wyib, k3, repeat from * to end of row (in color Steel).

Rows 3 and 4 (right to left, knitting in the round):  *K5, skip1 wyib, repeat from * to end of row (in color white).
Keep working in this manner until end of chart, then repeat, changing colors every 2 rows.


That's it! Mosaic and Skip/slip stitch knitting is fun and easy and gives a dramatic result. Please leave any questions you may have on this topic in the comments below and I will update the post as needed to add helpful information.

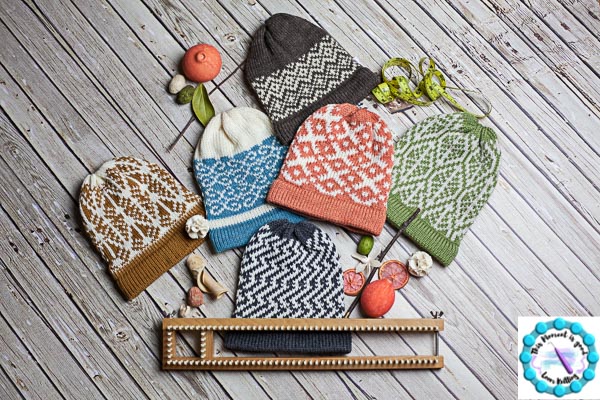
Hello, today I announced the winners of our Fair Isle Hat Collection! I'd like to congratulate Ashbandicoot, Xavia Marsh and Ryan. Thank you to everyone who participated in this promotion, I had a lot of fun with it!

Update! It's the end of the day and I'd like to thank all of our customers and readers for making this the most successful pattern launch ever. I'm so excited to see that so many loom knitters are trying Fair Isle...loom knitting has come so far. I can't wait to see all of the finished hats-Nicole


Loom Knit hat patterns, loom knit fair isle hat patterns, loom knitting patterns, loom knit beanie pattern, loom knit

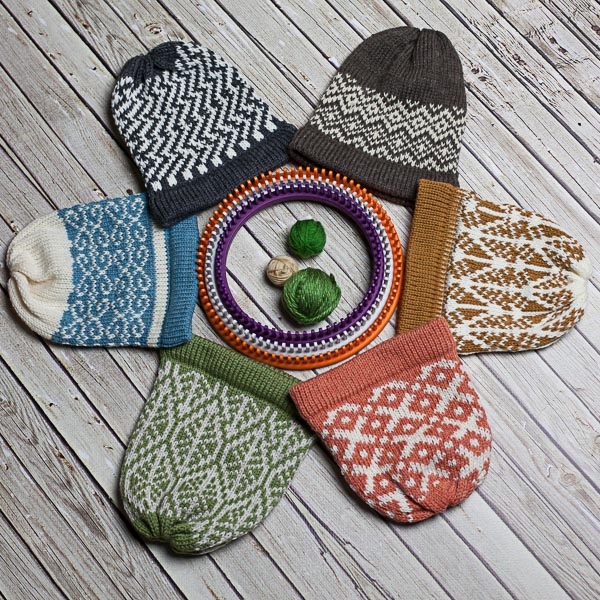
Exciting news...the (6) Fair Isle hat patterns are now available to everyone at a discounted price of $1.42 a pattern when bought in this collection! 


The loom knit Fair Isle Hat Patterns are available on...
Click and Get them while they are on sale!

Loom Knit hat patterns, loom knit fair isle hat patterns, loom knitting patterns, loom knit beanie pattern, loom knit

Description

Loom Knitting Pattern Description
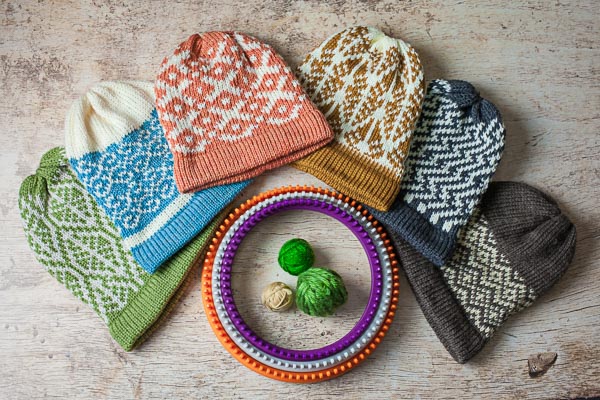
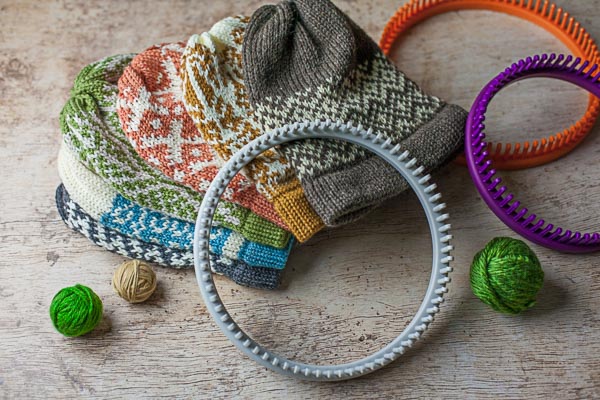
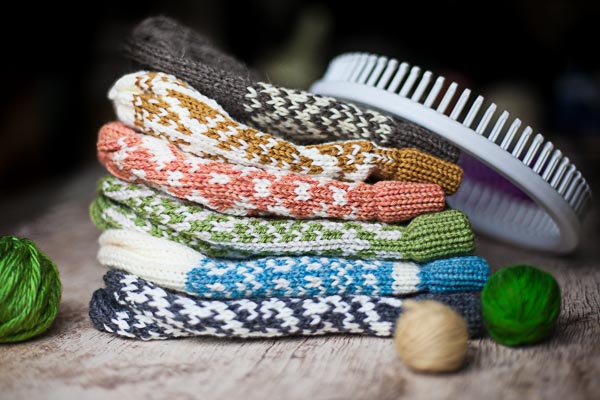
(6) Modern Fair Isle Loom Knitting Patterns. All patterns are customizable by the loom knitter for color and pattern placement. This pattern collection is in PDF format. Free PDF readers are available online. The patterns have been written for multiple sizes/looms. 
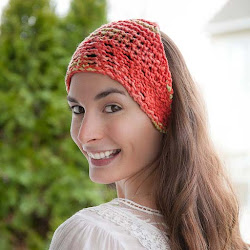
Hat names: Indus, Fracture, Leaf,  Flourish, Medallion and Staccato.

Loom

3/8” Peg Spacing Round Loom; Adult sample hats were done on 84 sts, Knitting Board Adjustable loom. All hats may be done on peg numbers divisible by 12. Example; 24, 36, 48, 60, 72, 84, etc. Make sure to use appropriate yarn to fit the loom used. 1 strand of worsted was used on all sample hats. Because of the stranding, Fair Isle has less “give”/stretch then other forms of knitting so swatching for size is recommended. 

Level

Confident Beginner. We have tutorials on our blog for doing colorwork. [How to loom knit Fair Isle.]  Skills needed: Regular knit stitch, purl stitch, stranded knitting.

Hat Sizes

Hats may be made in any size using a multiple of 12 stitches/pegs.

Loom Knit hat patterns, loom knit fair isle hat patterns, loom knitting patterns, loom knit beanie pattern, loom knit

Loom Knit hat patterns, loom knit fair isle hat patterns, loom knitting patterns, loom knit beanie pattern, loom knit

Loom Knit hat patterns, loom knit fair isle hat patterns, loom knitting patterns, loom knit beanie pattern, loom knit

Don't forget to share your finished This Moment is Good projects with us on our Facebook page!

Happy Looming!

Hello loom knitters and welcome to our color series! This is topic 3, Intarsia.

Color is everywhere...it affects our mood, inspires us and makes us feel more creative!


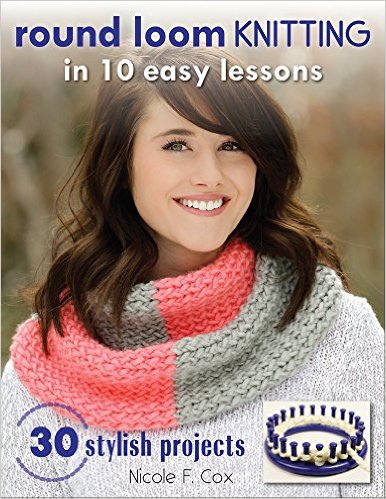
The above pattern can be found in Round Loom Knitting in 10 Easy Lessons by Nicole F. Cox


This is the 3rd in a series of blog posts and accompanying videos, pictures discussing different methods of using color in your loom knitting. Check back for future articles or subscribe to our mailing list to be the first notified of the new posts in this series. This post is about Fair Isle loom knitting.


The series will include


  • Topic 1: Beginners! Simple Colorwork on the loom including, self-striping, variegated yarn, stripes and color changes, vertical and horizontal colorwork (post link)
  • Topic 2:  Fix the jog!
  • Topic 3:  Fair Isle loom knitting
  • Topic 4:  Intarsia on the loom
  • Topic 5:  Mosaic & Skip/slip Stitch Loom Knitting
  • Topic 6:  Finding color inspiration
  • Bonus! How to Fix the jog when knitting stripes.
  • All the topics will include video links where applicable.

What is Intarsia?

Simply put, Intarsia is picture knitting. Argyle was the first known pattern using the Intarsia method. In the 1500's it was used for kilts and footwear in Scotland. In later decades, it has been adapted to include a vast array of shapes and has come a long way from just argyle! Here's a tip, you can also do argyle as stranded knitting...see our post on Fair Isle.

Do I carry my yarn along the back of my knitting like in Fair Isle?

No, when doing Intarsia, you use separate balls of yarn and do not carry your yarn. The Intarsia picture is knit in an isolated position within your project.
Is Intarsia hard on the loom?

No, it's quite easy. If you can twist and untwist yarn strands, read a chart/pattern and do the regular knit stitch then you can do Intarsia.


How do I work Intarsia so that I don't have gaps in my fabric?

You work Intarsia just like you do large vertical blocks of color. Whenever your main yarn meets up with the Intarsia area, you twist your yarns together, joining them and eliminating gaps. How to Twist The Yarn. The only difference is that you will be following a chart instead of doing straight lines. 


What types of things can I knit in Intarsia?

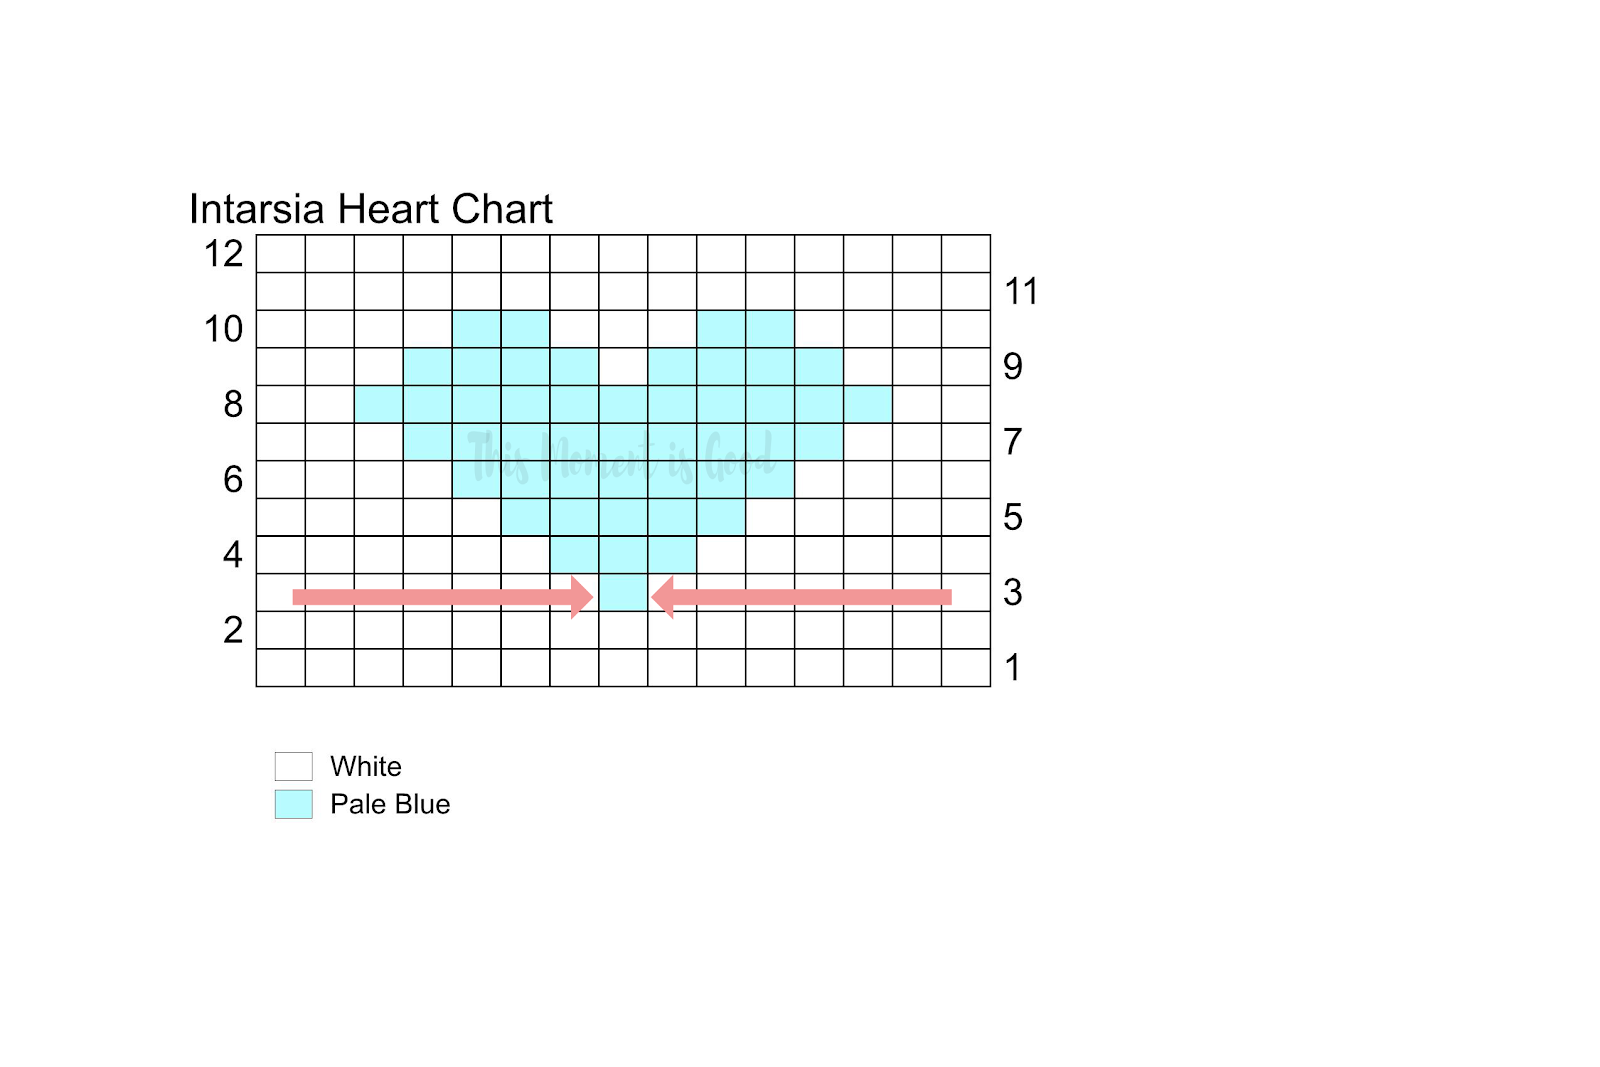
The picture can be of anything that you can chart, geometric shapes, hearts, silhouettes, names, etc. See the heart chart below.

Referring to the chart above

  • The blue area is knit separately from the white area with the exception of the top of the heart where there is white (you would make a small ball of yarn to knit this area, it is considered part of the picture).
  • Where the white and blue areas meet you would twist your yarn and turn to go in the opposite direction with each separate color.
  • Keep an eye on your yarn threads and make sure they do not become overly twisted or they will become difficult to manage.
  • In Intarsia, the white yarn for the main knitting area is NOT carried over the blue area. You change directions and knit flat,  in the opposite direction, after twisting your yarn together.
  • Once the blue area is finished, your picture or Intarsia is finished. Resume knitting as you normally would when you are not working Intarsia.

What will the back of my knitting look like?

It will look like the picture below. The full picture is knit in an isolated area but because the outside border yarn was twisted together with the Intarsia yarn, it forms one whole piece. Do you see how the picture yarn (red is easiest to see) was not carried around the project? It's a cool effect that makes your picture really stand out!

I'm glad you've joined me for this color series and hope you are feeling more confident about trying these color techniques on the loom. Please leave any questions below so that I can continue to improve my blog posts.


Powered by Blogger.